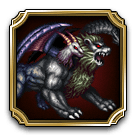
Defeat the Demon Chimera [Final Fantasy: Brave Exvius]
![Defeat the Demon Chimera [Final Fantasy: Brave Exvius]](https://onlinefanatic.com/wp-content/uploads/2016/09/Monster-142.png)
The second boss (Demon Chimera) of the Vortex is a lot tougher than the White Dragon, you could beat the White Dragon with a low level team if you had units that could poison and either sleep or paralyze. The Demon Chimera is a lot stronger, hits harder and is fully immune to all status effects except sleep.
Statistics
| Location | Lv | HP | MP |
| Farplane Vortex of Trials – Rebirth of the Demon Chimera |
45 | 200000 | 120 |
Resistance
| Element Resistance | |||||||
| Fire | Ice | Lightning | Water | Aero | Stone | Holy | Dark |
| +100% | +100% | +100% | – | – | – | – | – |
| Status Resistance | |||||||
| Poison | Blind | Sleep | Silence | Paralyze | Confuse | Disease | Petrify |
| null | null | +20% | null | null | null | null | null |
Might be better to say what the Demon Chimera isn’t immune to after looking at that. Normal attacks work, sleep works, but at a reduced rate and has a higher chance to fail, water, aero, stone, dark and holy are the only magic attack sources that will work outside of element free magic attacks like Hyper Drive and Meteor.
Attacks
| No. | Skill | Effect |
| 1 | Normal Attack | Single Target Physical Damage |
| 2 | Frost | Single Target Ice Magical Damage |
| 3 | Blaze | AOE Fire Magical Damage |
| 4 | Snowstorm | AOE Ice Magical Damage |
| 5 | Thunder | AOE Thunder Magical Damage |
| 6 | Poison Breath | AOE Poison Damage (use at 50%) |
Attack Sequence
Turn 1: Chimera will attack players with a mix of skill 1 and 2, 2-3 times per turn.
Turn 2: On Turn 2, Chimera will cast Blaze or Thunder. As we do not know which skill it will cast, Players will need to get your Barfira and Barthundara up by Turn 2
Turn 3: Normal Attack
Turn 4: On Turn 4, Chimera will cast Blaze or Thunder depending on what it cast on turn 2. Example if Chimera cast Blaze on Turn 2, it will cast Thunder on Turn 4, if it cast Thunder on Turn 2, it will cast Blaze on Turn 4. Players may need to reapply 1 of the Bar-spell on this turn.
Turn 5:On Turn 5, Chimera will cast Snowstorm, so be prepared to apply your Barblizzara.
After turn 5: After Turn 5, it’s just alternating between skill 1 and 2, so make sure you just top off the low HP units and finish the match.
At 50% and 30% Hp: At 50% and 30% HP, Chimera will cast Poison Breath on all your units. You can choose to remove the poison or heal past the damage.
General Overview:
Defeating the Demon Chimera is quite possible though, but unlike the first trail boss, you may want to have a 5 star team for all 5 slots, a notable exception being Krile, who can Dualcast the Bar spells, which makes her a great asset to any team.
For newer players, Lasswell and Fina are okay, but Rain is a bit weak and should be rotated out by a better melee character.
Strategy:
If you have Krile, awesome, if not it’s okay, but make sure you do collect the 3 bar spells (fire, ice, lightning). Ideally the your support unit can cast Level 3 Green Spells, and be a backup healer. Krile does the best job of this, but bringing a second healer who can cast the bar spells would be your next choice.
The beginning of the match follows a formula, so stick to that if you want to live. On turn 1 if you don’t have a Krile, then I’d recommend to start casting the Barfira and Barthundara buffs, by your 2nd turn both should be up. If you have a unit with Fullbreak, awesome, if not having Magic Break and Armor Break would be acceptable alternatives. Guard is a useful skill on boss battles where you know their going to launch a big attack and guard should be used in conjunction with the bar spells on turns 2 and 5.
After turn 5 this fight gets easy, so if you can survive the beginning, you’ll come out victorious and one Force Armor better for it.
Force Armor
![]()
Statistics
- Type: Armor (Heavy Armor)
- Stats: DEF+51, SPR+13
- Resistance: Fire (+10%), Ice (+10%), Lightning (+10%)
Assemble Your Team:
*Guide is based on units, items, and skills available as of 9/25/16
Recommended Build: 1 Tank, 2 Melee, 1 Support, 1 Healer
Recommended Tank Units:
Amarant
Charlotte
Cecil
Leo
Best: Warrior of Light (has Fullbreak)
Recommended Melee Units:
Garland
Thief
Firion
Artemios
Duane (has Fullbreak)
Locke
Best: Fencer
Best: Bartz
Best: Chizuru
Best: Lightning
Best: Cloud of Darkness (high resist)
Recommended Support Units:
Vaan (has Fullbreak)
Best: Cerius
Best: Krile (has Doublecast)
Recommended Healing Units:
Roselia
Garnet
Ludmille
Terra
Tellah
Best: Fina (has Cheer)
Best: Lenna (has Cheer)
Gear:
Star Pendant – DEF+3 – Resistance: Poison (Null)
- Obtained from: Chest: Port City Lydira and Fat Chocobo: Town of Kolts
Fairy Ring – DEF+3 – Resistance: Poison (Null), Blind (Null)
- Obtained from: Reward: (Colosseum) Beginner A-2
Sleep Dagger – ATK+22 – Effect: Sleep (30%)
- Obtained from: Recipe: (Quest) Pillow of Your Dreams and Reward: (Colosseum) Beginner C-5
Sleep Sword – ATK+35 – Effect: Sleep (30%)
- Obtained from: Chest: Mobreeze Airship Factory/Exploration
Spells:
Barfira – Increase fire resistance (50%) for 3 turns to all allies
- Obtained from: Recipe: (Colosseum) Beginner C-4
Barthundara – Increase lightning resistance (50%) for 3 turns to all allies
- Obtained from: Recipe: (Colosseum) Beginner B-2
Barblizzara – Increase ice resistance (50%) for 3 turns to all allies
- Obtained from: Recipe: (Silver Chest) Wolfsfang Peak/Exploration
Sleep – Sleep (40%) to one enemy
- Obtained from: Recipe: Town of Mitra
Poisona – Cure poison to one ally
- Obtained from: Recipe: Port City Lodin
Sleep Blade – Hybrid damage (1.2x) and sleep (30%) to one enemy
- Obtained from: Recipe: (Silver Chest) Industrial City Dilmagia
Optional Spells:
Shell – Increase SPR (20%) for 3 turns to one ally
- Obtained from: Recipe: (Silver Chest) Village of Kol
Recommended Items:
| Name | Effect |
| Potion | Restores a small amount of HP to one ally. |
| Hi-Potion | Restores a moderate amount of HP to one ally. |
| X-Potion | Restores a large amount of HP to one ally. |
| Ether | Restores a small amount of MP to one ally. |
| Turbo Ether | Restores a moderate amount of MP to one ally. |
| Elixir | Fully restores one ally’s HP and MP. |
| Phoenix Down | Revives one ally from being KO’d. |
| Antidote | Cures one ally of poisoning. |
| Remedy | Cures one ally of all status effects. |
| Hyper | Causes limit gauge to fill more quickly. |


